

How To Off Uac In Windows 10
How to Disable UAC in Windows 10? Hither Are 4 Simple Ways! [MiniTool News]
By Vera | Follow | Last Updated
Summary :

Although disabling UAC is a terrible idea, this move is necessary if UAC prevents some applications from running properly. MiniTool volition show you how to disable UAC Windows ten. Additionally, some tips on how to change UAC for standard user to automatically deny UAC elevation requests are also introduced simply.
What Is UAC in Windows 10
UAC, brusk for User Account Control, is a component of Microsoft Windows'southward security system. It can help mitigate the impact of malware by preventing apps from making unwanted changes on the PC.
Windows 10 will pop up a UAC confirmation dialog to ask you to confirm the change or non when some software attempts to change arrangement-related parts of the file system or Windows Registry. Simply put, UAC can offer a special security environment, which protects your user business relationship that has limited admission rights well.
Withal, turning UAC on sometimes prevents programs from running well. So, a solution is to disable UAC in Windows x. In this postal service, nosotros will introduce iv methods.
Tip: Enabling UAC can be an additional protection tip to prevent unsafe apps and viruses. Disabling information technology without a reason is a terrible idea! So, be cautious of this.
Related commodity: How to Protect Your Computer from Virus
How to Disable UAC Windows ten
Choice one: Disable UAC via Control Panel
Step 1: Type control console in the search bar of Windows 10 and click this app in the result to open it.
Stride 2: Become to User Accounts > Change User Account Command settings.
Step 3: Elevate the slider command to Never notify and click OK to use the change.
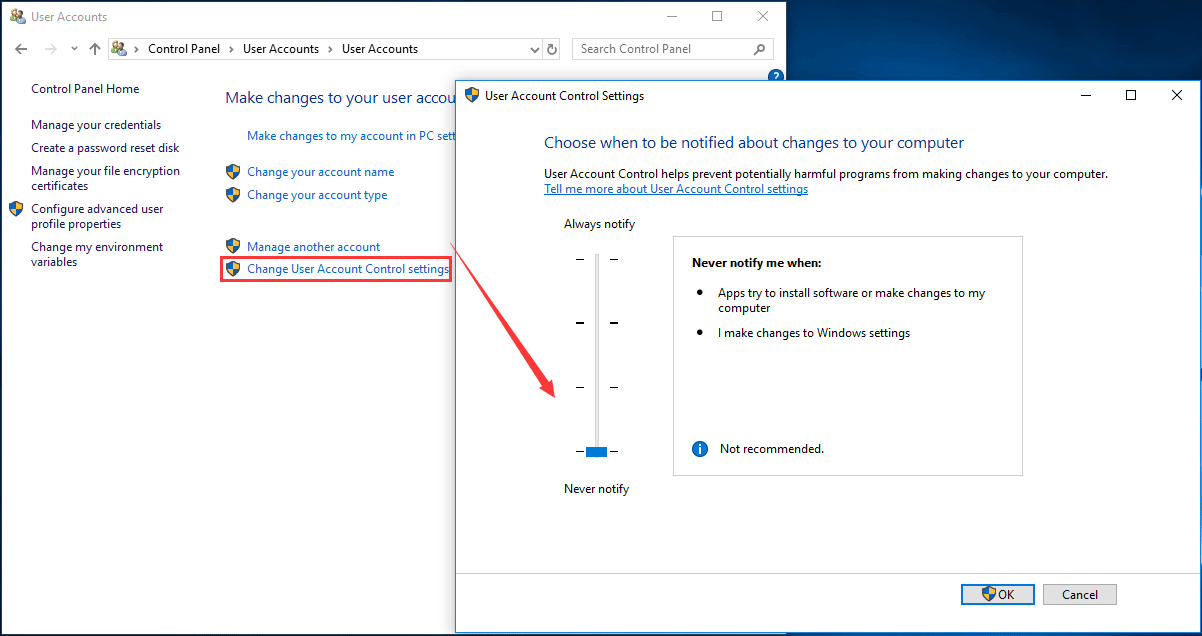
This manner, the UAC is disabled and you won't receive any notification. But this won't completely disable User Account Control that is nonetheless active in the background.
Option 2: Disable UAC Windows ten Command Line
Step 1: Run Command Prompt as administrator.
Stride two: To plow off UAC Windows 10, enter the following command and press Enter:
reg.exe ADD HKLM\SOFTWARE\Microsoft\Windows\CurrentVersion\Policies\System /v EnableLUA /t REG_DWORD /d 0 /f.
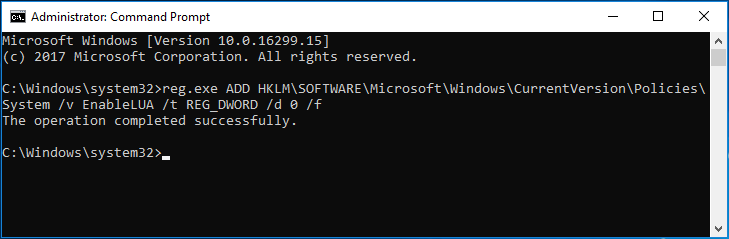
Tip: To plough UAC on, apply the command - reg.exe ADD HKLM\SOFTWARE\Microsoft\Windows\CurrentVersion\Policies\System /v EnableLUA /t REG_DWORD /d 1 /f.
Step 3: Reboot your computer to allow the alter take upshot.
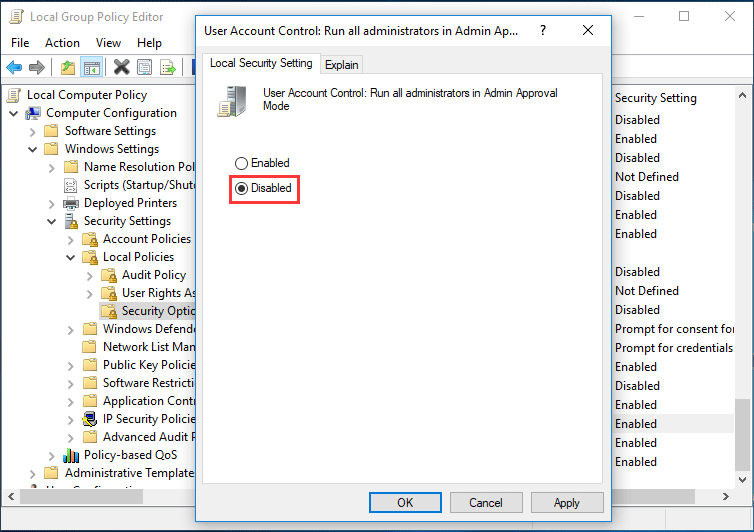
Choice 3: Disable UAC Group Policy
Step 1: Input Policy Editor in the Windows 10 search box and click Edit grouping policy.
Step 2: Get to Computer Configuration > Windows Settings > Security Settings > Local Policies > Security Options.
Step three: Scroll downwardly to the bottom to find User Account Command: Run all administrators in Admin Approval Mode and double-click on it, choose Disabled and click OK.
Option 4: Disable UAC Windows x Registry Key
Note: Earlier changing Windows Registry, nosotros recommend yous to back up registry to avert system accidents.
Step 1: Press Win plus R keys to launch the Run dialog.
Footstep 2: Input regedit.exe and click OK.
Footstep 3: Go to the path:
HKEY_LOCAL_MACHINE\SOFTWARE\Microsoft\Windows\CurrentVersion\Policies\System
Footstep four: Double-click on the key - EnableLUA and change its Value data to 0.
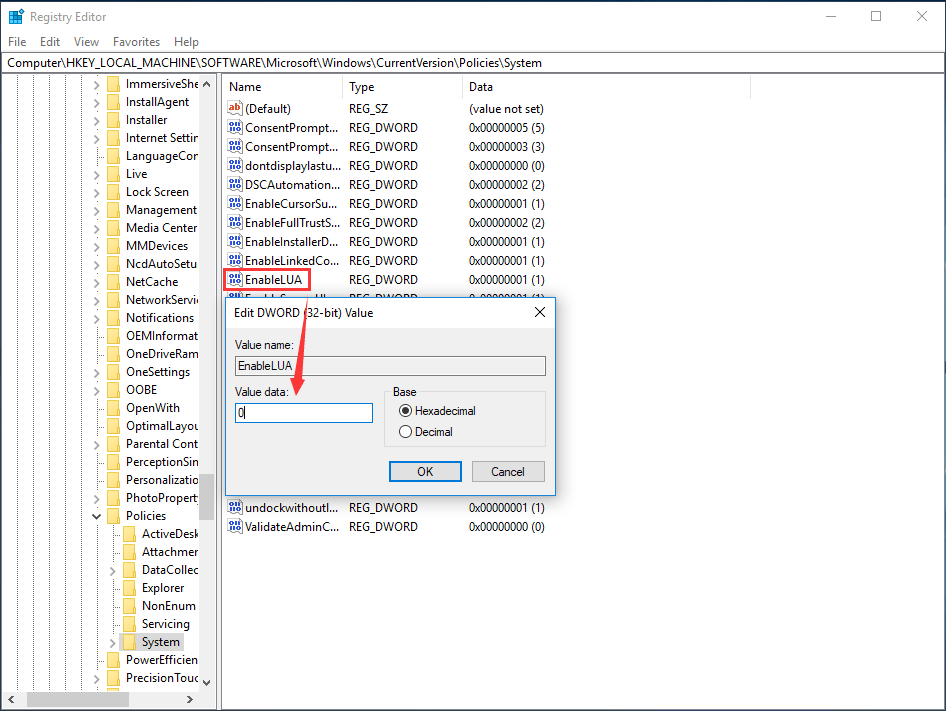
Step 5: Save the change and restart your computer.
Now, we have shown you how to disable UAC Windows 10 in detail. In improver, you may want to set UAC to automatically deny tiptop requests from users with standard-level credentials to avert beingness prompted to enter administrator credentials to confirm all the time when running a programme requiring elevated permissions.
How to Automatically Deny UAC Height Requests
You tin can do this work via Windows Registry or Grouping Policy.
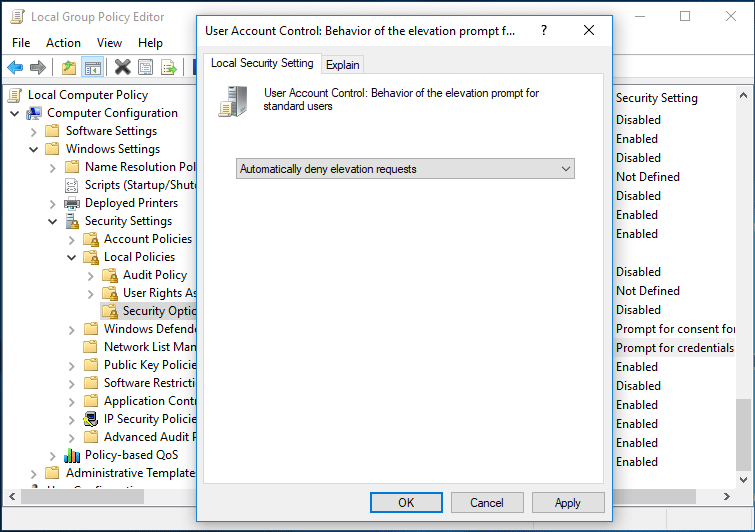
In Group Policy, go to Calculator Configuration/Windows Settings/Security Settings/Local Policies/Security Options, double-click on User Business relationship Control: Behavior of the elevation prompt for standard users and cull Automatically Deny elevation requests.
In the Registry Editor window, navigate to HKEY_LOCAL_MACHINE\SOFTWARE\Microsoft\Windows\CurrentVersion\Policies\System, double-click the ConsentPromptBehaviorUser key and change its Value data to 0 then that you can automatically deny UAC elevation requests.

The Stop
Afterward reading this post, you will know clearly on how to disable UAC Windows 10 and how to alter UAC for standard user to automatically deny elevation requests. Just endeavour the methods above based on your needs to perform these operations to User Account Control.
Source: https://www.minitool.com/news/how-to-disable-uac-windows-10-004.html
Posted by: bowersockle1995.blogspot.com
0 Response to "How To Off Uac In Windows 10"
Post a Comment